Many of the image processing operations in Igor Pro® can be selectively applied to a user defined region within the image. This region is known as the region of interest or ROI. Many operations that support an ROI can execute significantly faster when the ROI is used to define a region that is much smaller than the full image.
Igor Pro®'s ROI is completely arbitrary in that it may be defined by any set of image pixels. In particular, the ROI does not have to be rectangular or connected; it may consist of one or more disjoint regions.
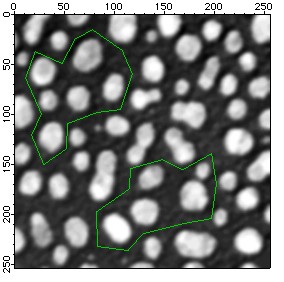
An image of blobs with an ROI defined as the area of pixels interior to the two green polygons.
A more complex ROI can be defined as we show in the example below. The ROI is the bluish shaded region within the image.
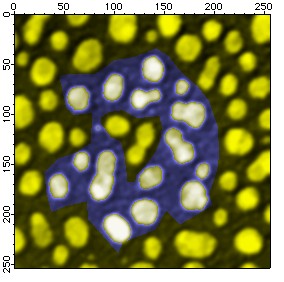
In this case the ROI excludes a couple of internal blobs.
The ROI concept is also supported in 3D operations with one extra twist. Most operations that handle 3D images support a /P flag that allows you to operate on a plane by plane basis in which case the ROI is still a 2D wave. If you are processing the full 3D wave you can use a corresponding 3D ROI which follows the same requirements as in the 2D case.
Some methods for creating an ROI
1. Draw the region on top of an image and using the operation ImageGenerateROIMask.
2. Define the region mathematically using a command line, e.g.,.
Make/N=(rows,cols) roiWave=255
roiWave[startRow,endRow][startCol,endCol]=0
3. Provide a pair of waves that define a closed contour and use ImageBoundaryToMask operation.
4. Use ImageSeedFill together with a seed and a selection rule.
5. Use ImageAnalyzeParticles operation with the mark keyword.
6. Use ImageThreshold/i.

Forum

Support
Gallery
Igor Pro 10
Learn More
Igor XOP Toolkit
Learn More
Igor NIDAQ Tools MX
Learn More